
Hello everyone, my name is Adnan, and welcome to the blog. There are few tech problems more frustrating than turning on your PC only to see it stuck on the “Undoing changes made to your computer” screen. It’s a stressful loop that can make you feel like your computer is broken and your files are lost forever. As a tech enthusiast who has fixed this exact issue for friends and family here in Lahore, I know that feeling of panic all too well.
But here is the good news: Don’t panic. Your PC is most likely not broken, and in most cases, your files are completely safe. This error is typically caused by a failed or corrupted Windows Update, and it is almost always fixable. In this step-by-step PC repair guide, We will be walking you through several of the official Recovery options in Windows to fix this problem. Let’s get your PC back up and running.
Understanding the “Undoing Changes” Message
When a Windows PC displays the “Undoing changes made to your computer” message, it signifies that a recent update installation has failed. In response, the operating system initiates a rollback procedure, attempting to revert any partial or corrupted changes to preserve system integrity. This error is often caused by a corrupted or failed Windows Update. Think of it as a safety mechanism, trying to return the PC to a working condition before the faulty update.

Common Culprits Behind the Undoing Changes Loop:
- Corrupted Update Files: Sometimes, downloaded update files can become damaged or incomplete, preventing a successful installation.
- Software Conflicts: Third-party antivirus programs, outdated drivers, or other background applications might interfere with the update process, leading to a rollback.
- Insufficient Disk Space: Windows requires a certain amount of free space to unpack and install updates. A full system drive can halt the process and trigger an undo.
- Power Interruptions: An unexpected shutdown or power loss during the critical update phase can corrupt the installation, leading to the system attempting to undo changes.
- Corrupted System Files: Underlying issues within the Windows operating system’s core files can prevent updates from integrating correctly.
- Hardware Incompatibility: Though less common, a new update might introduce a conflict with specific older or less common hardware components.
The “How Long” Question: Patience is Key (Initially)
A crucial question for anyone staring at this screen is, “How long will this take?” Typically, this undoing process can take 20 minutes to an hour. The duration often depends on the size of the update, the speed of the PC’s storage drive (SSD vs. HDD), and the overall system specifications.
However, a critical point to remember is when to worry. If the message persists for more than two to three hours without any visible progress (e.g., no hard drive activity, no percentage change, or a completely frozen screen), the system is likely stuck and requires manual intervention. A critical warning must be given: never force shutdown the computer if it appears to be actively working, even slowly. Doing so during an active system operation can lead to severe operating system corruption, making the recovery process much more difficult.
My Own Encounter with the “Undoing Changes Loop”
It is easy to feel isolated when facing a computer problem that seems insurmountable. Many users experience this with the “Undoing changes” loop. I remember the first time I saw this screen myself. It was late at night, I had just finished a big project with a looming deadline, and my PC decided to initiate an update. Waking up to “Undoing changes” felt like a punch to the gut. My mind raced, thinking about potentially lost work and the hassle of a full reinstall. The anxiety was palpable, and the initial instinct was to panic and hit the power button.
However, drawing on experience, it was clear that panicking would only exacerbate the situation. A calm, methodical approach became the strategy. By systematically going through the steps outlined below, it was possible to get the PC back on track without losing anything crucial. This personal experience underscores the importance of patience combined with a structured troubleshooting process, turning a moment of dread into a successful resolution.
Step-by-Step Troubleshooting Solutions
When facing the “Undoing changes” loop, a systematic approach is essential. Begin with the least intrusive methods and progress to more advanced solutions if the issue persists.
Phase 1: The Initial Checks & Safe Restart
Give It More Time (If Under 2 Hours): If the process has been running for less than two hours and there are any signs of activity (e.g., a spinning circle, flickering screen, hard drive activity light blinking), it is advisable to simply wait. The system may still be completing the rollback process.

- Disconnect Peripherals: Unplug all non-essential external devices from the PC. This includes printers, external hard drives, USB sticks, and any other peripherals. Sometimes, a conflict with an attached device can prevent the system from completing its process.
- Perform a Hard Shutdown (Only if Truly Stuck): If the screen has been completely frozen for more than 2-3 hours with absolutely no activity, a hard shutdown might be necessary.
- Instruction: Press and hold the computer’s power button for 10 to 15 seconds until it shuts down completely.
- Rationale: Perform this action only as a last resort when the system becomes completely unresponsive.
- Action: Wait a few moments, then press the power button again to restart the PC. Observe if it boots normally or re-enters the loop.
Phase 2: Accessing the Windows Recovery Environment (WinRE) / Safe Mode
If the PC continuously cycles back to “Undoing changes” after a restart, access the Windows Recovery Environment (WinRE) to initiate advanced troubleshooting.
- Method 1: Repeated Power Cycles:
- Instruction: Turn on the PC. As soon as the Windows logo appears (or the spinning dots), immediately hold the power button to force shutdown. Repeat this process two or three times.
- Outcome: This action should automatically trigger the Automatic Repair environment, which is the gateway to WinRE.
- Method 2: Shift + Restart (If Login Screen is Accessible):
- Instruction: If the PC somehow reaches the login screen, click the Power icon in the bottom right corner. Then, hold down the Shift key while clicking Restart. This will also take you to WinRE.
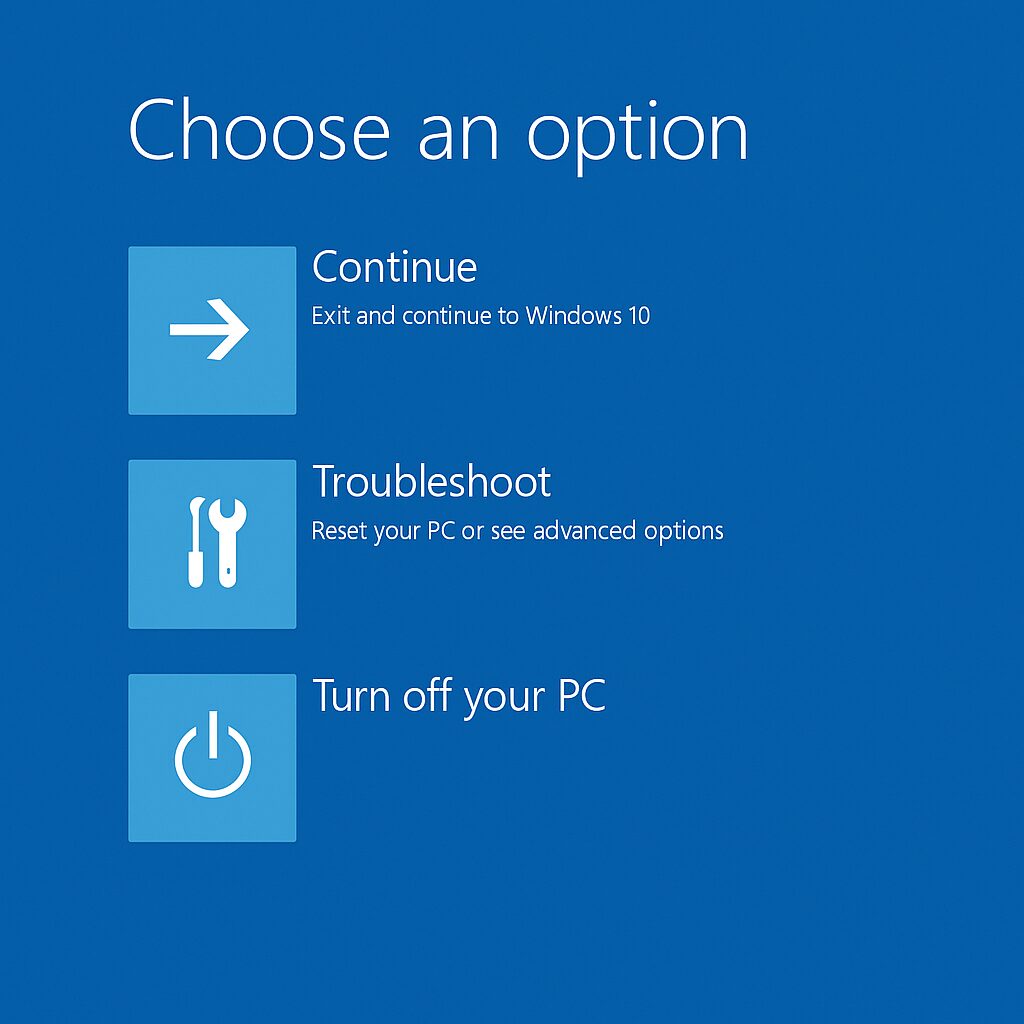
- Navigating WinRE: On the blue Windows Recovery Environment screen, choose Troubleshoot, then go to Advanced options.
- Entering Safe Mode: From the Advanced options menu, proceed to Startup Settings > Restart. After the restart, a list of options will appear. Press F4 to boot into Safe Mode or F5 for Safe Mode with Networking (which allows internet access for downloads).
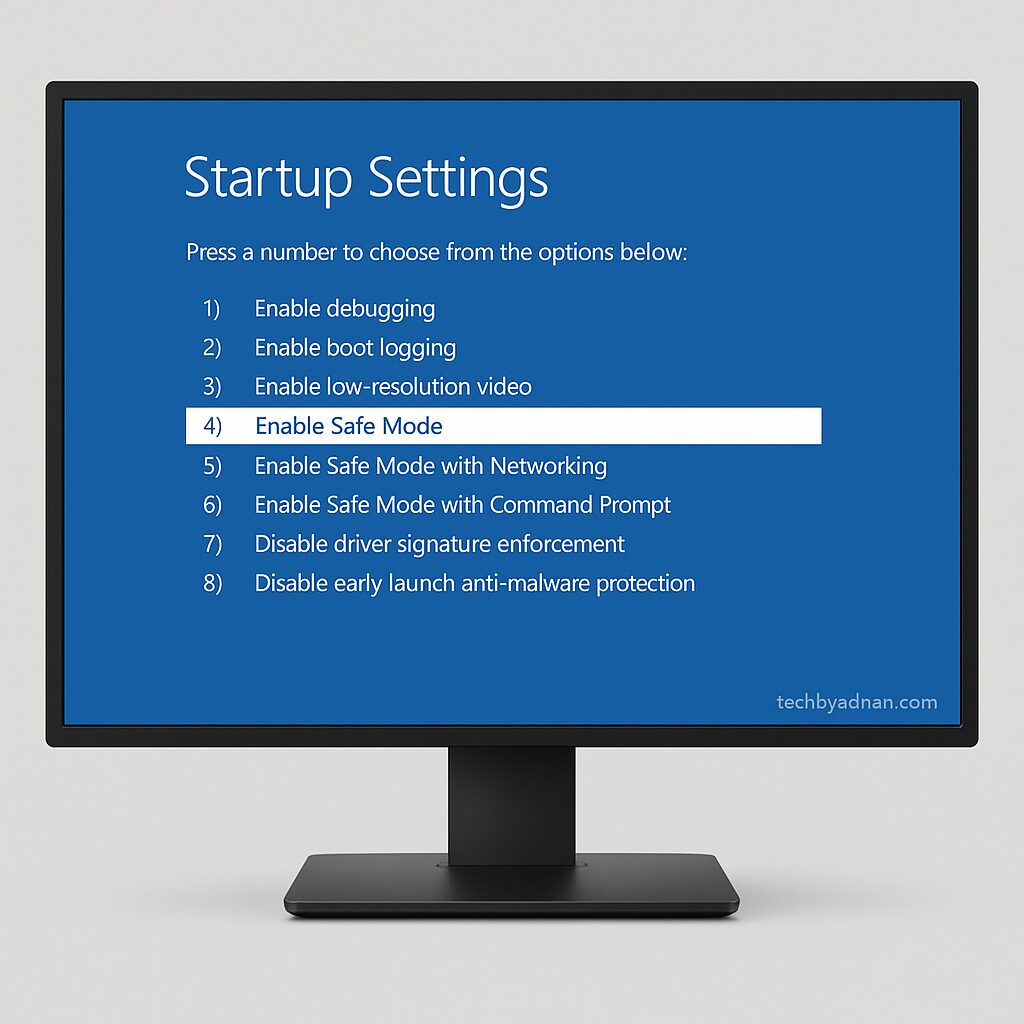
Rationale: Safe Mode loads Windows with only essential drivers and services, often bypassing conflicts that prevent normal startup and allowing users to perform fixes.
Phase 3: Troubleshooting Within Safe Mode (or WinRE)
- Uninstall Recent Updates:
- Instruction (from Safe Mode): Open Settings, navigate to Update & Security (or Windows Update), then select View update history and click on Uninstall updates.
- Guidance: Identify the most recent “Quality Updates” or “Feature Updates” that might have caused the issue. Select them and click “Uninstall.”
- Expert Tip: Quality updates are smaller, monthly updates, while Feature updates are larger, less frequent upgrades (e.g., Windows 10 to 22H2). Focus on uninstalling the specific update that likely caused the problem.
- Run System File Checker (SFC) and DISM:
These command-line tools can repair corrupted Windows system files.

- Instruction: Open Command Prompt as Administrator (from Safe Mode, search for “cmd” and right-click to run as administrator; from WinRE, select Command Prompt from Advanced options).
- SFC Command: Type sfc /scannow and press Enter. This command checks for and repairs corrupted or missing system files.
- DISM Commands: If SFC finds issues it cannot fix, or if you want a more thorough check, use the Deployment Image Servicing and Management (DISM) tool.
| DISM /Online /Cleanup-Image /CheckHealth (Checks for corruption) |
| DISM /Online /Cleanup-Image /ScanHealth (Scans for potential issues) |
| DISM /Online /Cleanup-Image /RestoreHealth (Repairs the Windows image using Microsoft servers) |
Action: After running these commands, close the Command Prompt and try restarting the PC normally.
- Reset Windows Update Components:
Sometimes, the Windows Update cache itself can become corrupted. Resetting it can resolve the issue.
- Instruction: Open Command Prompt as Administrator again.
- Commands: Execute the following commands one by one, pressing Enter after each:
| net stop wuauserv |
| net stop bits |
| rename C:\Windows\SoftwareDistribution SoftwareDistribution.old |
| net start wuauserv |
| net start bits |
Rationale: These commands stop the update services, rename the folder where update files are stored (effectively clearing the cache), and then restart the services, allowing Windows to create a fresh update directory.
- Perform a System Restore:

- Instruction: From WinRE (Advanced options > System Restore).
- Explanation: System Restore allows users to revert their system’s files, installed programs, and registry settings to an earlier point in time (a “restore point”).
- Critical Note: Reassure users that their personal files—such as documents, photos, and videos—are typically not affected during a System Restore, as the process mainly targets system settings and installed programs. However, any programs installed after the chosen restore point will be uninstalled.
- Guidance: Select a restore point from a date before the problematic update occurred.
- Temporarily Disable Antivirus/Third-Party Software:
If the PC is able to boot into Safe Mode with Networking, temporarily disable or uninstall any third-party antivirus software or recently installed applications. These can sometimes interfere with update processes
Phase 4: More Drastic Measures (Last Resort)
If the above steps do not resolve the issue, more significant actions may be necessary.
- Startup Repair:
- Instruction: From WinRE (Troubleshoot > Advanced options > Startup Repair).
- Explanation: This is an automated diagnostic and repair tool that attempts to fix common startup problems, including those related to botched updates.
- Reset This PC:
- Instruction: From WinRE (Troubleshoot > Reset this PC).
- Options: This option offers two choices:
- “Keep my files”: Reinstalls Windows while keeping your personal files intact; however, it removes all installed applications and system settings.
- “Remove everything”: Performs a complete wipe of the drive and reinstalls Windows.
- Warning: Strongly emphasize the need for comprehensive data backup before choosing “Remove everything,” as this will permanently erase all data on the system drive.

- Clean Install of Windows:
- Instruction: This is the ultimate last resort if all other troubleshooting steps fail. It involves creating bootable USB media (using Microsoft’s Media Creation Tool on another working PC) and reinstalling Windows from scratch.
- Warning: A clean install will delete all data on the system drive. The absolute necessity of backing up all important files before attempting this step cannot be overstressed.

Preventing Future “Undoing Changes” Headaches
While no PC is immune to update issues, proactive measures can significantly reduce the likelihood of encountering the “Undoing changes” loop again.

- A. Regular Data Backups: The most crucial preventative step is consistent data backup. Implement a strategy for backing up important personal files to cloud storage (like OneDrive, Google Drive) or an external hard drive. For ultimate protection, consider creating system image backups.
- B. Ensure Sufficient Disk Space: Always maintain at least 15-20 GB of free space on the primary system drive (usually C:). This provides ample room for updates to download, unpack, and install without issues.
- C. Keep Drivers Updated (Carefully): Outdated or corrupted drivers are a common cause of system instability during updates. Regularly check for and install driver updates from your PC manufacturer’s website or the hardware component manufacturer’s site. However, exercise caution and avoid installing drivers from unknown sources.
- D. Use Reputable Antivirus Software: While sometimes a temporary conflict, a reliable and up-to-date antivirus program is essential for overall system health, protecting against malware that could corrupt system files.
- E. Avoid Interrupting Updates: Once an update begins, especially during the restart phases, allow the process to complete naturally. Do not force shutdown or pull the power plug unless the system is demonstrably frozen and unresponsive for an extended period.
Conclusion: Regaining Control of Your PC
The “Undoing changes made to your computer” message is undoubtedly one of the most frustrating experiences for a Windows user. However, by understanding its root causes and approaching the problem with a systematic, step-by-step methodology, users can often resolve it without resorting to drastic measures. if you have followed all these steps and are still stuck, you can seek help from experts and other users on the official Microsoft Community forums.
Armed with this comprehensive guide, users are now empowered to troubleshoot effectively, regain control of their PCs, and take preventative steps to minimize future disruptions. If a user encounters this issue again, they now possess the knowledge to confidently navigate the repair process. We encourage readers to share their success stories or ask further questions in the comments; shared experiences benefit the entire tech community.
Frequently Asked Questions (FAQ)
What if my computer is stuck on “Undoing Changes” for more than 3 hours?
If the message persists for over 2-3 hours with no activity, it’s likely stuck. At this point, it’s generally safe to perform a hard shutdown (hold the power button for 10-15 seconds) and then attempt to boot into the Windows Recovery Environment (WinRE) to begin troubleshooting.
Will I lose my personal files if I perform a System Restore or Reset This PC?
A System Restore typically does not affect personal files, but it will uninstall programs installed after the restore point. “Reset This PC” offers two options: “Keep my files” (removes apps, keeps personal files) and “Remove everything” (wipes the drive clean). Always back up your data before performing any major system recovery.
Can I stop the “Undoing Changes” process once it starts?
It is strongly advised not to interrupt the “Undoing changes” process if the PC is actively working (e.g., spinning circle, hard drive activity). Forcing a shutdown during this critical phase can corrupt the operating system, leading to more severe problems. Only intervene if the system is completely frozen and unresponsive for an extended period.
What’s the difference between System Restore and “Reset this PC”?
System Restore reverts your system files, registry, and programs to an earlier working state without affecting personal files. “Reset This PC” is a more significant process that effectively reinstalls Windows, with the option to keep personal files or remove everything.
READ MORE ARTICLES
The Ultimate Guide: How to Optimize Your Gaming PC for RT
Optimize Gaming Laptop for VR: Complete 2025 Guide
Build a Home Media Server Using an Old PC (Your Personal Netflix)
An Introduction to Mechanical Keyboards: A Guide for Gamers and Typists (2025)
The Ultimate Guide to Replacing Adobe Photoshop & Illustrator with Free Alternatives (2025)
Midjourney vs. Stable Diffusion: Which AI Art Generator is Right for You? (2025 Guide)
Huion vs. XP-Pen: The Best Budget Drawing Tablet for Beginners (2025)